


From Zero to Comic in Three Months
A Bird's Eye How-To Guide


Between this January and April, I went from having just an idea for a graphic short story all the way through writing and illustrating to having a finished comic published online (you can read it here) and a physical print run produced and on book shelves in several local book/comic shops.
It was a fantastic experience—I learned a lot and also just really enjoyed the process. I thought I’d share how I did it in case it’s helpful to anyone else out there who has an idea and doesn’t know where to start.
“Comics are, at their heart, a punk-rock medium. Any person with access to mark-making tools can tell a full story, something that shows their unique view on the world.”
-Molly Ostertag, In The Telling
One thing that’s special and powerful about the comics/graphic story medium is how accessible it is as a mode of expression. I love this about graphic storytelling. Back in college, I explored pursuing animation as a career, but it’s so labor-intensive to create. Animated feature films take teams of hundreds of people several years to produce. But with graphic stories, you really can tell a full story by yourself, as the quote above from Molly Ostertag, a graphic novelist, expresses.
As self-publishing becomes more common, this may be eroding, but we have this sense that to be “published” means that a publishing company must have approved of your work (in other words, “validation”) and agreed to invest their time and money into getting it out to the world. But allowing only a few entities to decide what is worth being shared with the public would be extremely creatively stifling—and would have deprived us of what are now very well-known works that were self-published before a publisher picked them up. For example, Beatrix Potter self-published The Tale of Peter Rabbit after she got fed up with publisher rejections.
Before I get into my step-by-step, I’ll share a few of the resources that I looked at to find my way and which I refer to in my guide.
First, I found graphic novelist Victoria Ying’s Introduction to Comics course on Schoolism super helpful. It gives you a full rundown from start to finish of creating a comic, and at a high level it provided the structure that I ran through in creating my own comic. Now, it is behind a paywall (for what it’s worth, I’ve found Schoolism to be a great resource for learning about a wide range of creative disciplines and am not being paid to say so), but there are free things I relied on, too.
The other resource for the overall “creating a comic” process that I referred to a lot was Molly Ostertag’s (the graphic novelist quoted above) 10-post overview of the process over at her Substack. She also gets into more detail about the craft of writing and creating the art than I will in this high-level guide.
And with that, let’s dive in.
A Bird’s Eye How-To Guide to Self-Publishing a Graphic Story
To begin with, let’s assume you have your idea already worked out, including what the story is about and who the characters are. Here are the five steps you’ll move through to get to your finished creation at the end:
Write the script
Design the characters and environments
Draft the page layouts (“thumbnailing”)
Create the art
Publish
1. Write the Script
First, you’ll want to write the script. It’s best to start by working out your story with just text because it’s much easier to revise things, move plot points around, fiddle with dialogue, etc. when it’s just words on a page rather than drawings.
Script Format
The precise style of your script format doesn’t matter so much if it’s just you working on your project. Whatever works best for you is what you should do. But it may be helpful to draw on some industry conventions since they did develop for the sake of ease of use between different people in different roles, and also to practice for when one day you might be working with others on a project (particularly if you end up being a writer while someone else illustrates).
Ying goes over different script formating styles in her Schoolism course and also here on her blog. Ostertag talks about scripting in her Substack guide, but about format she notes that she loves scripting for graphic novels because she can do whatever she wants. And there’s more you can find with a quick search (I use Duck Duck Go usually, but “Googling” as it were), with each person giving slightly different guidance.
Like Ying does, I ended up using a mix of “screenplay format” and “comics format”. But my style is more detailed, plotting out what’s on which page and what’s going to be in the panels on each page. I worked out roughly what I wanted visually during the scripting stage since it helped me to work out the flow of the story and made it easier to just create when it came time to do all the art.

Get More Eyes On Your Script
Once you feel like your script’s in decent enough shape, it’s a good idea to get some others’ eyes on it. You might be embarrassed to open yourself up to judgement, but try to get comfortable with it since you’re eventually going to be sharing your story with even more people (right?). This is an opportunity to test your ideas with a “safe” audience.
Ask people you trust to:
Be supportive of what you’re trying to do, and
Actually share critiques if they have any—you don’t want just validation, you want fresh eyes who can see potential problems that you might be missing.
Of course, you don’t have to take others’ suggestions,1 and you may get conflicting views from different reviewers. What’s going to improve your artistic vision? Take what’s helpful and leave what’s not.
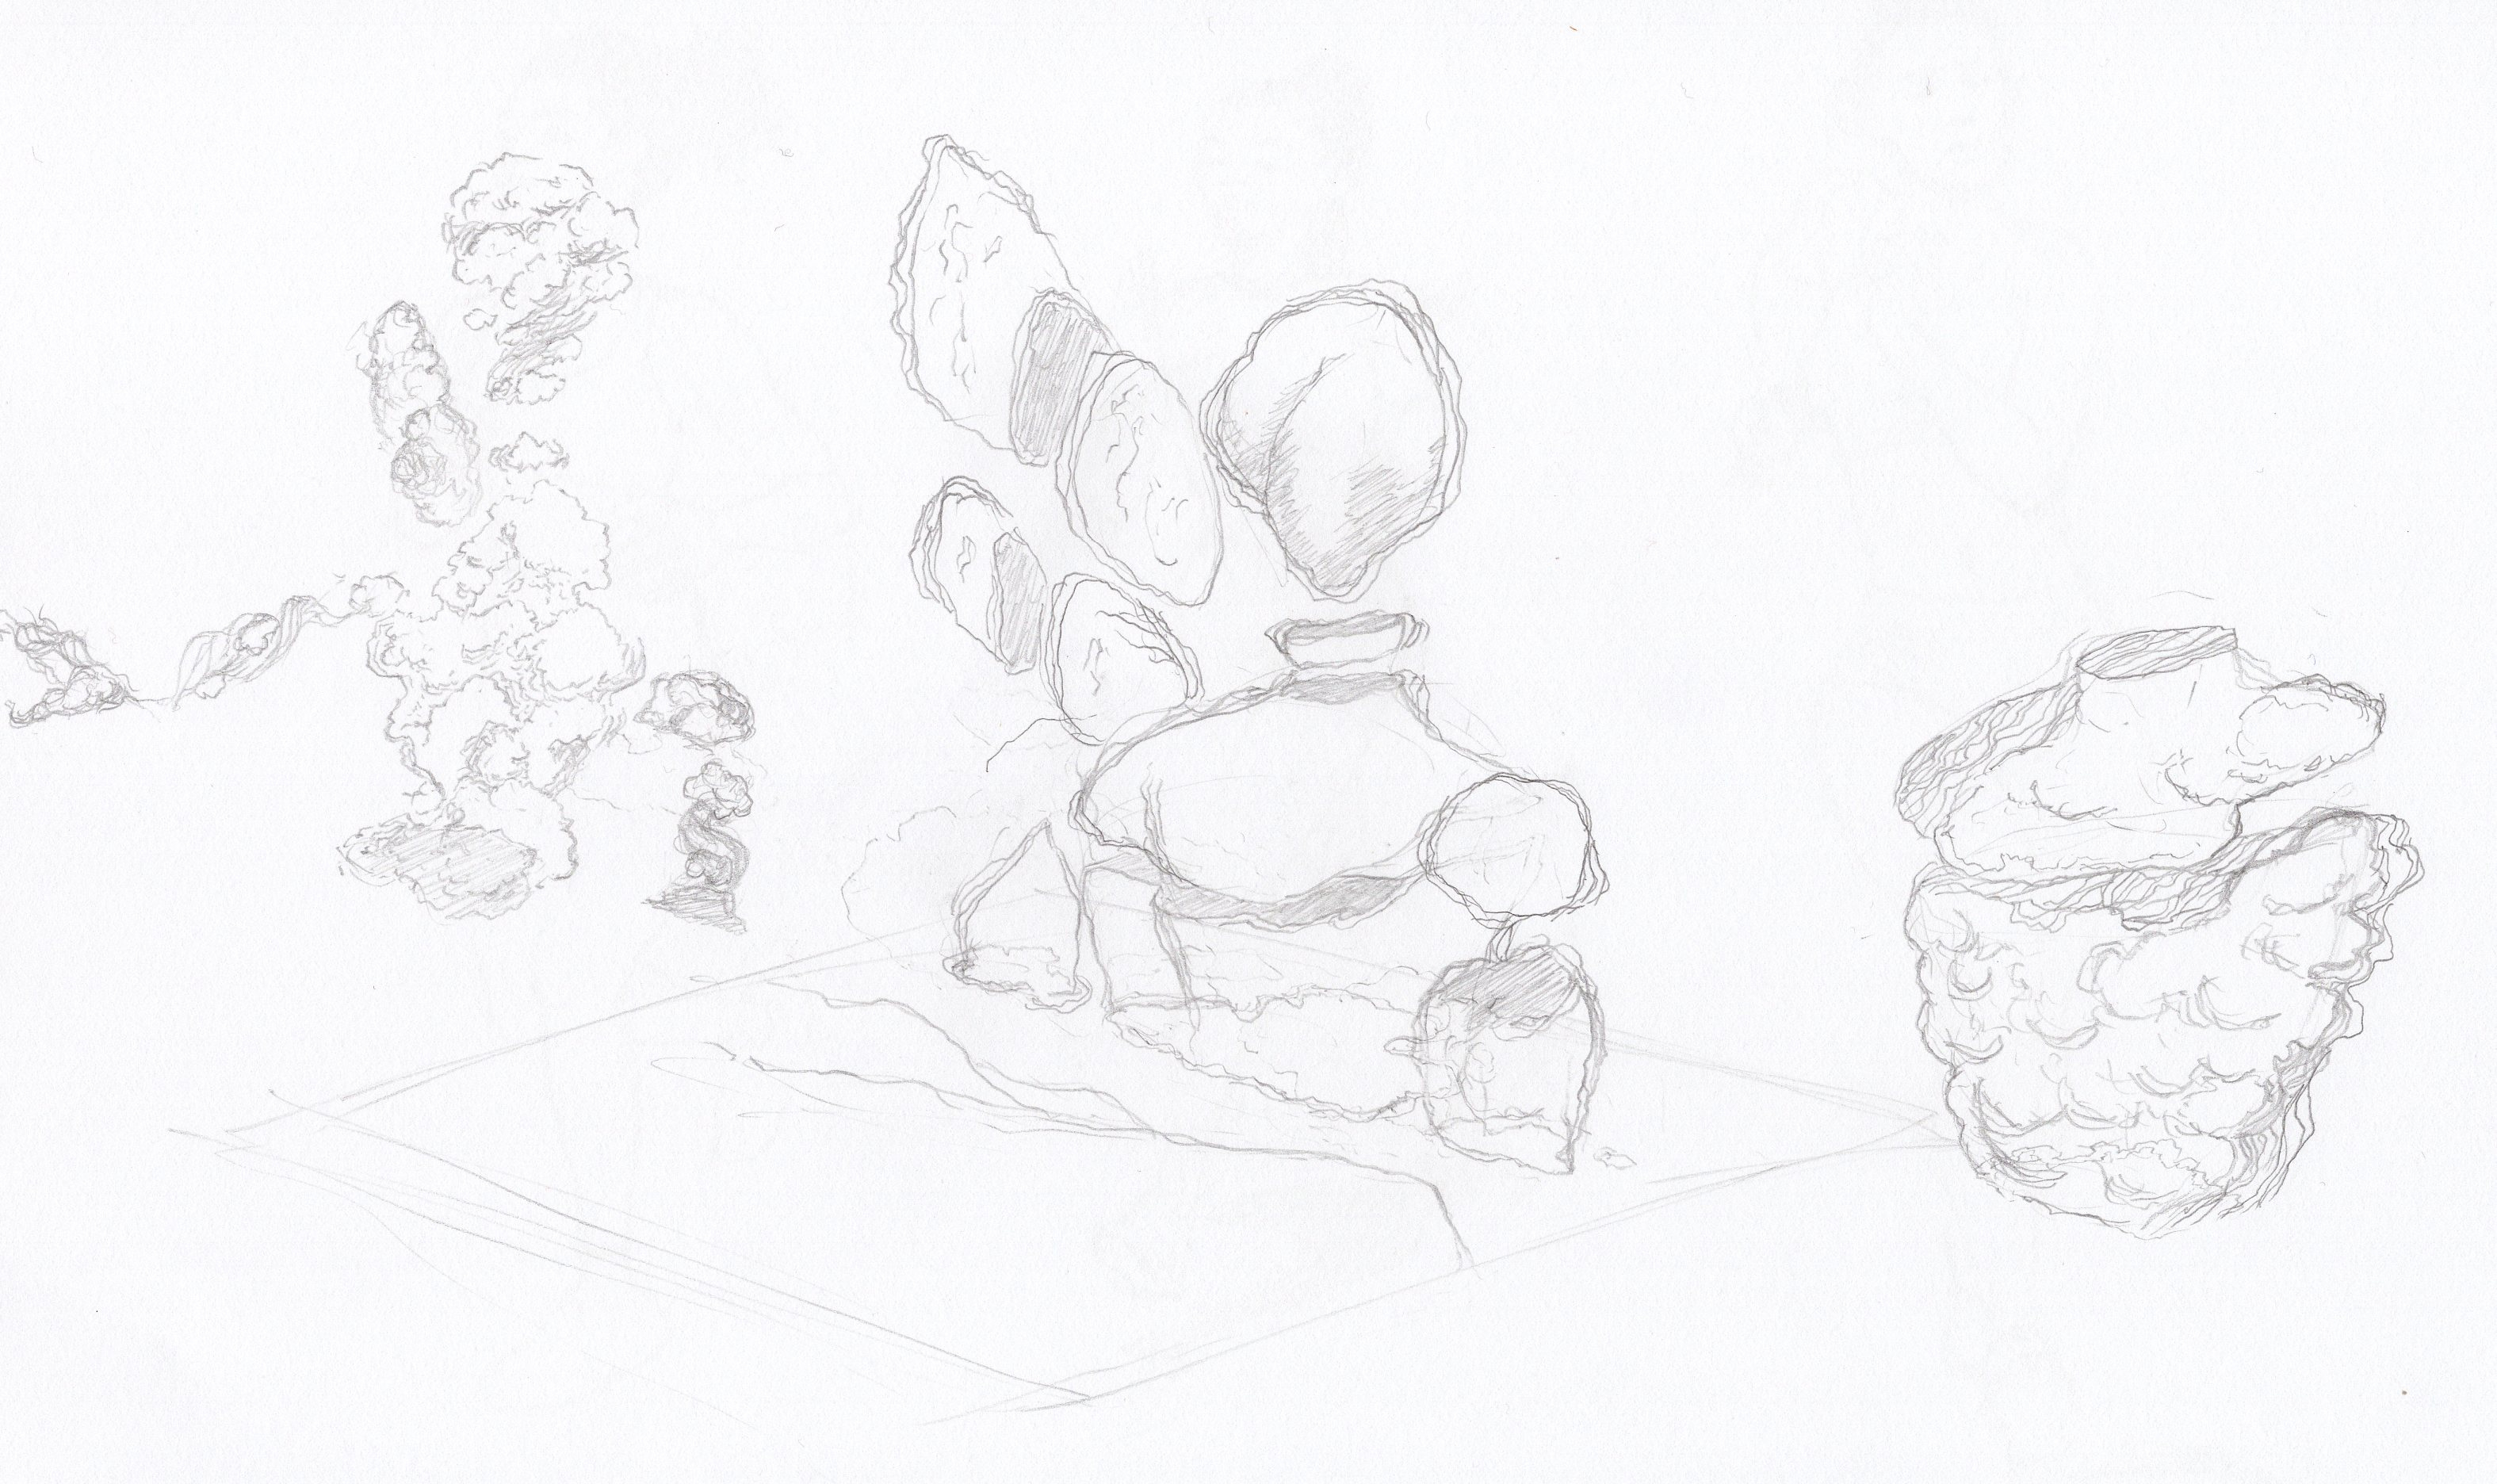
2. Design the Characters and Environments
Once your script is ready to go, it’s time to start working on visuals, and in particular character (and environment) design. If you’re working on a big story, you’ll want to put a lot more work in at this stage so that everything’s thought out and consistent since readers will be spending a lot of time with characters and potentially seeing locations from different angles and different lights. But if you’re doing a short story, then you may not need to nail everything down in advance. If the audience is only going to see an environment or character once in one panel, then think about how much is worth your time to do at this stage.
Phased is a short story, and I didn’t need to worry about elaborate recurring environments. So, this stage for me was about experimenting with illustration style and getting the look of the characters down.

It took me a lot of time trying different things and iterating on the design of the Extra-dimensional Being before I landed on a design because what the heck does an extra-dimensional being look like??
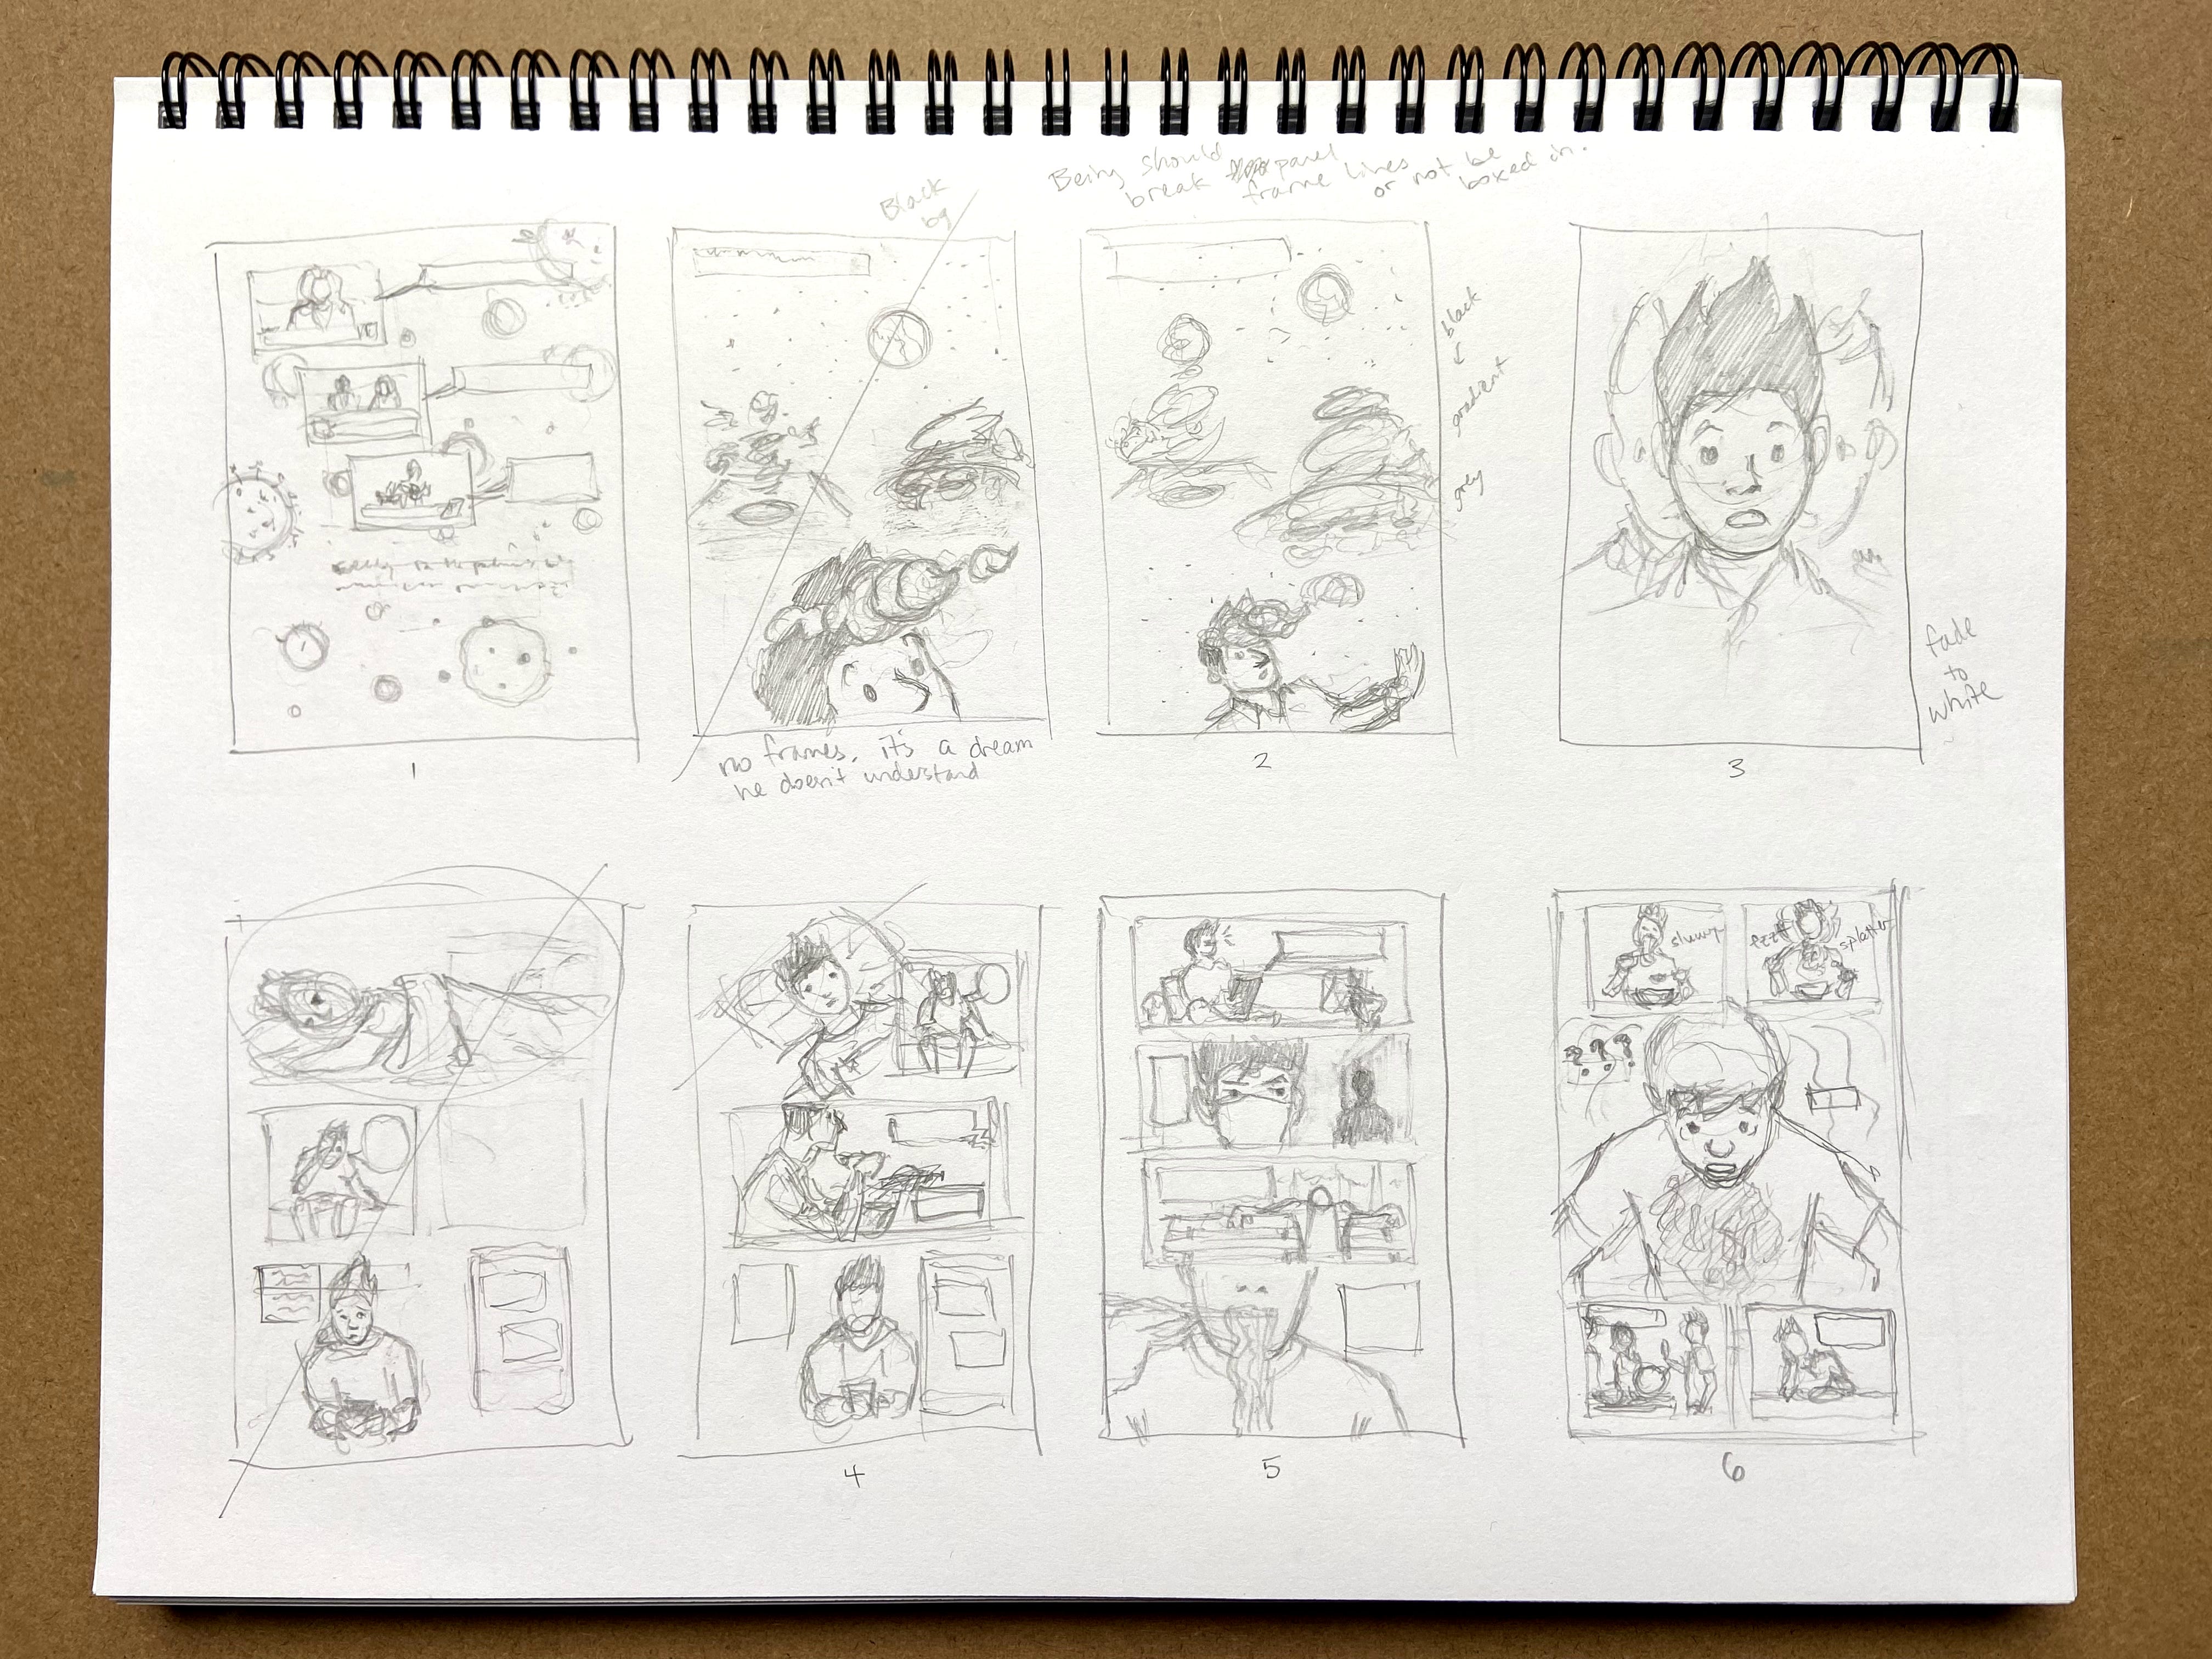
3. Draft the Page Layouts (“Thumbnailing”)
With the plot plotted and the designs designed, it’s time to draft the page layouts and panel compositions of your graphic story, a.k.a. “thumbnailing”. The dynamic of how panels relate to each other on and between pages is special to sequential art. It pays to be thoughtful with your layouts, to be sure to mine the expressive potential of the medium. You should also plan for where your speech and thought bubbles, narration, and sound effects (all the text) will go in the panels.
Ostertag has a great discussion of the dynamics to consider.
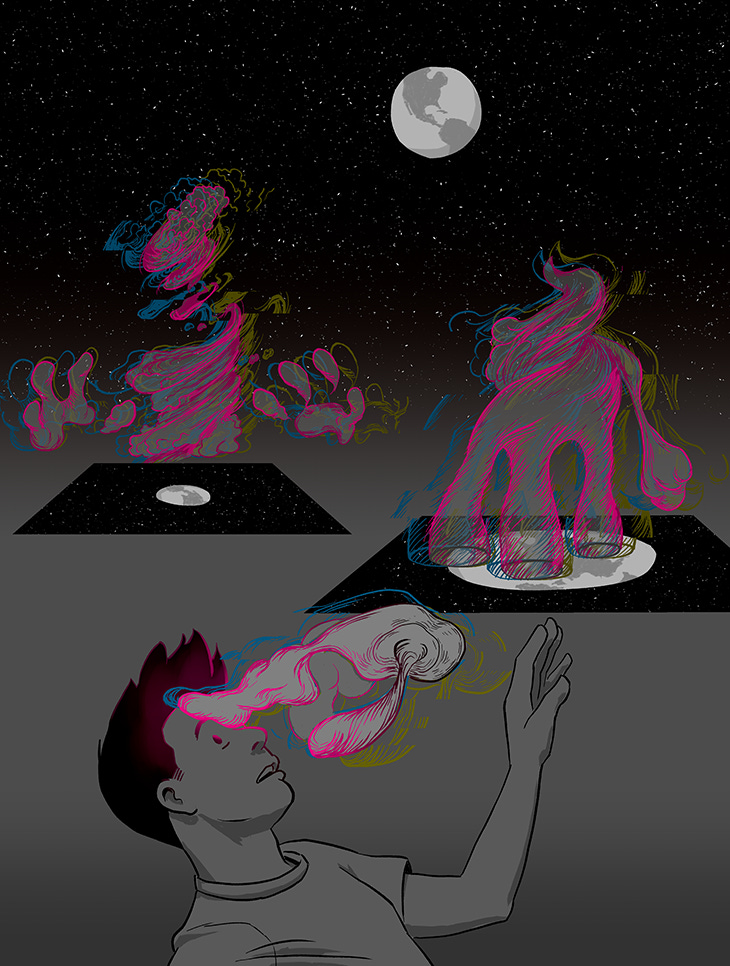
4. Create the Art — “Execution Mode”
Alfred Hitchcock apparently used to say that once he’d finished planning a movie, it was essentially done and shooting the film was just a formality.2 I totally get this with graphic storytelling, too. Once the script is written and the page layouts have been drafted, the comic has largely been created in my mind and it’s just down to “doing the thing”. I call this “execution mode”.
To me, what’s nice about this phase of the process is that a lot of the hard work of creating something from nothing is already done. Now all you have to do is execute on the planning. Of course, there’s still creative work to be done. Depending on how detailed you drafted the layouts, you’ll still need to dial in the particulars of your compositions and illustrations. Maybe something doesn’t actually work that well with your script or page layout now that you’re seeing things in close to final form. It’s not too late to change things and address problems—but hopefully there won’t be much need and any fixes won’t require major overhauls.
The three sub-steps below are major parts of comics visuals, but aren’t all necessary. Maybe you’re only working with tone and color and no lines for your illustrations. Or maybe the reverse, only lines. Maybe there’s no text in your comic. I list them all here to cover the bases, and I had all three in Phased.
There’s no software or natural media that you must use. Use whatever is going to help you express the ideas you want to express.
One heads-up before you start, though, is that if you think you may want to get your comic printed and are working digitally, think about the margins and formatting you’ll need and set up your files accordingly. This will save you the headache of trying to resize things at the end. That’s a lengthy topic in itself, which you can find guides for with an easy online search, but here’s a resource.
Lines
With larger productions where there may be multiple people involved in creating a comic, typically the line art will get done first by the artist. And with a team producing the art, it could even be split among a “penciller” first followed by an “inker”.
Color
After the lines are done, color is added, by the same artist as did the line work or it could be by a different artist—the “colorist”.
Lettering
Finally, lettering is added, potentially by a third person, the “letterer”. As noted above, you should have made sure to plan your compositions so that the space for the letters was accounted for in advance. I’ll even sketch out the words during the sketching (“pencilling”) phase to help me get the composition right.
You can letter by hand or use type or combine the two. Hand-lettered text can add character to your work, but takes a lot more time. One way to get some of the best of both worlds is to create a custom font with hand-lettered characters. Calligraphr is a cool, free resource to create your own fonts.3
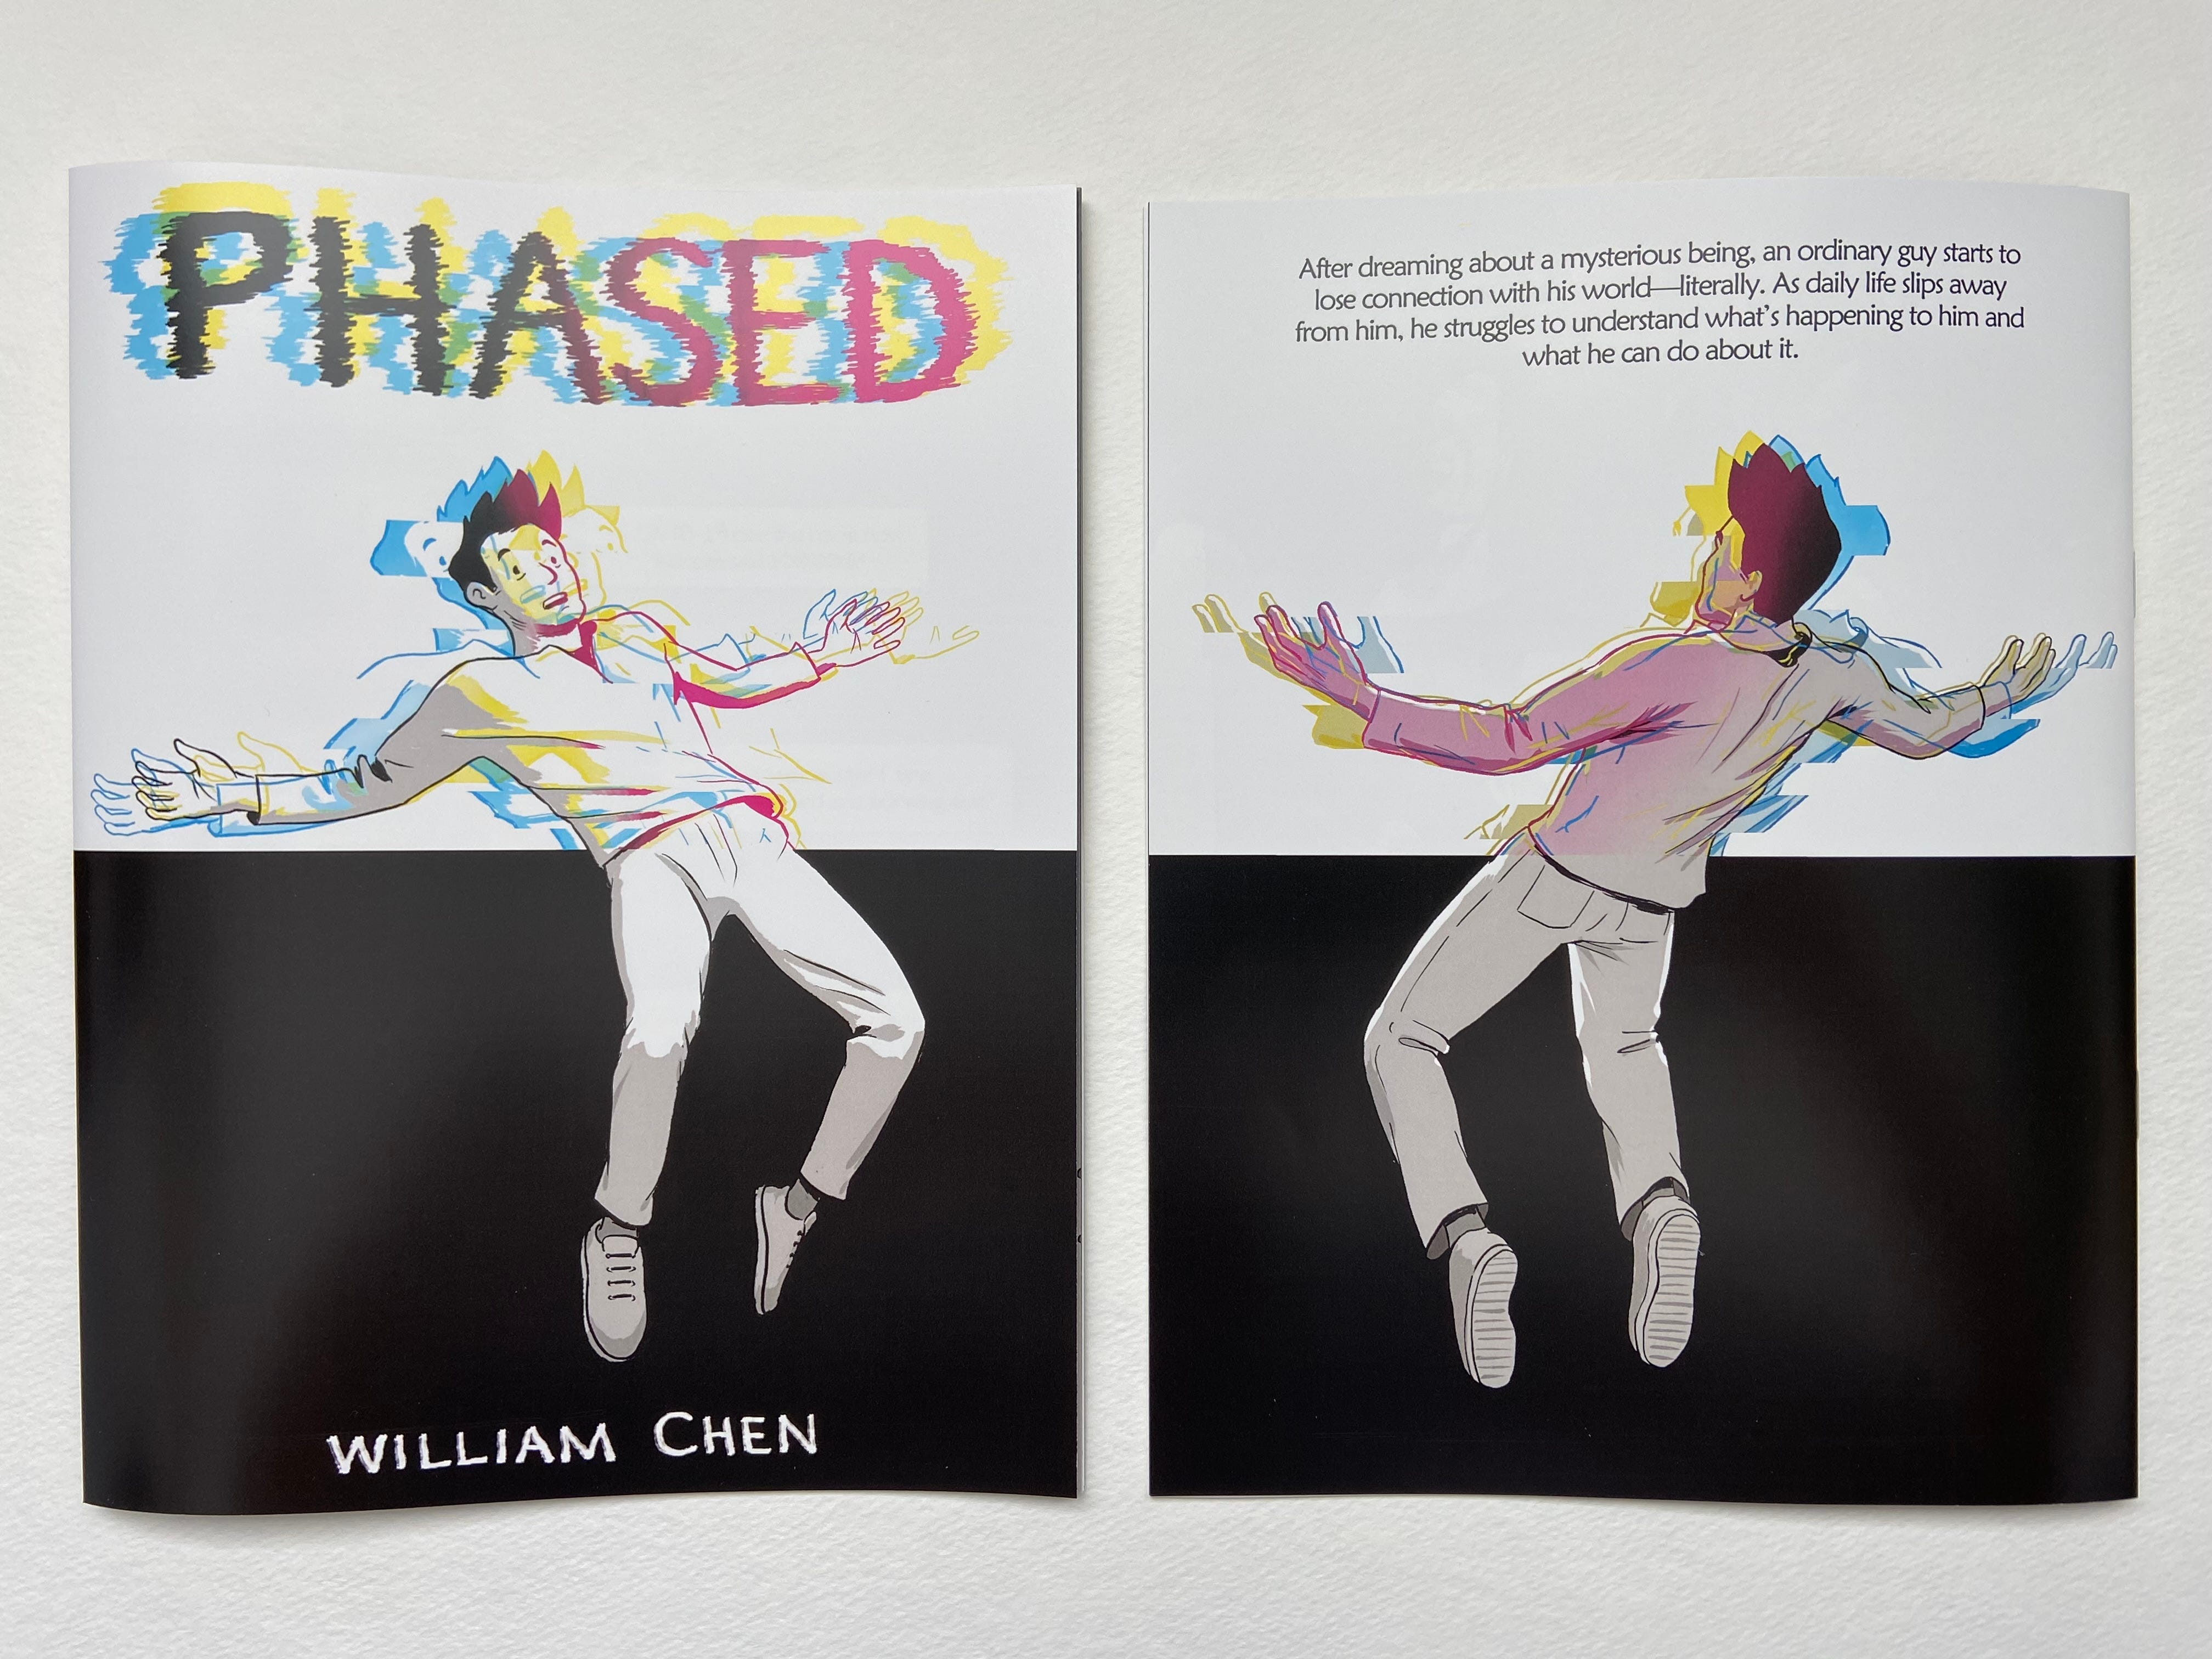
5. Publish
Congratulations! You’ve brought your idea from nebulous potential, navigating between the Scylla of I’ll-get-to-it-later and Charybdis of it’s-not-quite-perfect-yet, through to the shores of completion.
If you want to share your graphic story with others, you can do it digitally or/and physically.
Online
There’s all manner of platforms to share our thoughts and creations publicly on the internet these days, between social media and blogging. Substack is obviously one, and one that I went with. But even posting your work on a platform like Instagram I’d say is (self-)publishing, too.
You may want to think about the benefits and constraints of different platforms and what will serve your creation best. What I found preferable about a blogging platform like Substack is that it allows for long posts to present all the pages of my comic together and can easily be viewed with a browser on a computer with a larger screen. Instagram, on the other hand, caps posts at 10 images and is generally used on mobile screens only, which isn’t ideal for Phased. I ended up sharing pages serially on Instagram at the same time as on this Substack as I was completing them, but then did a follow-up all-in-one post on Substack sharing the whole story after I finished all the pages.
You could even build your own webpage to host your graphic story if you’ve got the skills, time, and means for it.
Print
There’s something qualitatively different experientially about viewing and holding in your hands a physical book versus reading on a screen. It seems like the physical tangibility makes a stronger imprint and forges a stronger connection with the reader. You could go very DIY and print at home or a place like your local FedEx and bind your book yourself, or pay more for a professional printer to do a nicer production.
If you’re going the DIY route, there must be guides on different zine-making techniques that are discoverable with a quick web search. I did not go that route and don’t have experience with it, so will just mention it for your consideration.
If you’re going the professional printing route, ask your friends, local comic creators, contacts for any recommendations they might have for local printers to get quotes from. This website has good advice on various topics related to comic printing.
And once you have physical copies of your book in hand, you can get them into others’ hands! You could give them to friends and family, or give/trade them with people you meet at conventions. You could sell them at conventions, or on your online store if you have one, or talk to your local comics shops to see if they sell local artists’ work on their shelves. If you created your graphic story to share your unique view with the world (as opposed to creating it just for yourself), then print copies give you more ways to share your ideas with others.
And that brings us to the end of this bird’s eye how-to guide on creating and self-publishing a comic. To recap:
Write the script
Design the characters and environments
Draft the page layouts (“thumbnailing”)
Create the art
Publish

“But William,” you protest. “I have a publisher and editor! How much can/should I give and take?”
Ok, first of all, congratulations on the book deal! But second, what are you doing here at my little overview guide for self-publishing neophytes?
Anyway, I think you just gotta feel that one out. It’ll depend on the publisher and editor, but in any case, you’ve entered a business deal and publishers will have an interest in what they think will sell and is in line with their business/strategy/image. So then, what changes don’t actually harm the core of what you are creating? What changes improve what you’re creating? What changes are just different? And what changes are a bridge too far?
Walter Chaw mentions this in the April 12, 2024 episode of Pop Culture Happy Hour.
Thanks to Ying who mentioned it in her course.
Nice William! Thanks for sharing. Super to see your process.